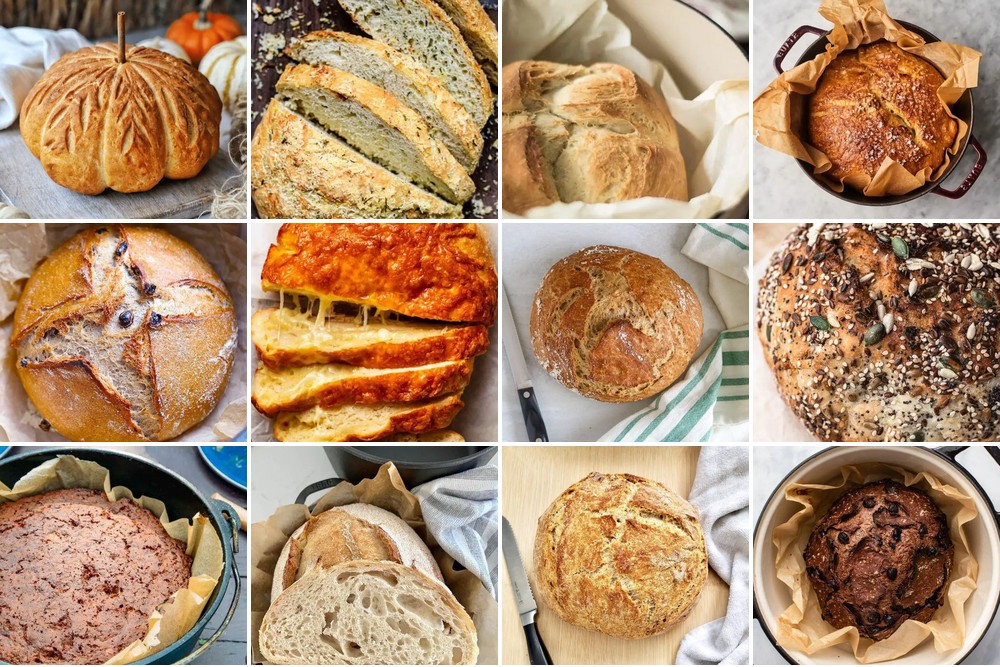
Master Easy Dutch Oven Bread: From No-Knead to Herb Infused
There's nothing quite like the aroma of freshly baked bread wafting through your home. While the idea of baking bread from scratch might seem daunting, especially with traditional methods, the Dutch oven has revolutionized home baking, making it incredibly accessible for everyone. With a simple, heavy-lidded pot, you can achieve professional-bakery quality loaves with minimal effort. This comprehensive guide will walk you through mastering delicious dutch oven bread recipes, from the famously easy no-knead method to an aromatic herb-infused creation, and even venture into wholesome and sweet variations.
The beauty of Dutch oven bread lies in its ability to mimic a professional steam oven. The heavy lid traps steam released from the dough during baking, creating a moist environment that allows the crust to expand fully before it hardens. This results in that signature golden, crispy crust and a remarkably soft, airy interior that everyone craves. Get ready to impress your family and friends with these irresistible easy dutch oven bread recipes!
The Magic of No-Knead Dutch Oven Bread: Simplicity Redefined
For many, the "no-knead" method is the gateway to homemade bread heaven. It's so straightforward, it almost feels like cheating! This technique requires virtually no effort, allowing time and natural fermentation to do all the work. The result? A perfectly crusted loaf with a delightful chewiness that belies its simplicity.
Ingredients for Classic No-Knead Bread:
- 3 cups all-purpose flour (or bread flour for a chewier texture)
- 1 ¼ teaspoons salt (kosher or fine sea salt works best)
- ½ teaspoon active dry yeast (or instant yeast)
- 1 ½ cups warm water (around 100-110°F or 38-43°C)
The Effortless Process:
- Mix the Dry Ingredients: In a large bowl, whisk together the flour, salt, and yeast. The salt helps control yeast activity and adds flavor, while the yeast is the magical leavening agent.
- Add Water: Pour in the warm water and mix with a wooden spoon or spatula until just combined. The dough will be shaggy and sticky – resist the urge to knead it! Cover the bowl tightly with plastic wrap or a damp towel.
- The Long Rise: Let the dough rise at room temperature for 12-18 hours. This extended fermentation is key to developing deep flavor and that characteristic airy crumb. The dough should at least double in size and be covered in small bubbles.
- Shape (Gently): Lightly flour your work surface and gently scrape the dough out of the bowl. With floured hands, lightly fold the edges of the dough towards the center a few times to create a loose ball. Avoid overworking it, as this can deflate the precious air bubbles.
- Second Rise & Preheat: Place the shaped dough onto a piece of parchment paper. Loosely cover and let it rest for another 30-60 minutes while you preheat your oven to 450°F (232°C) with your empty Dutch oven inside. Preheating the pot is crucial for achieving that amazing crust.
- Bake to Perfection: Carefully remove the scorching hot Dutch oven from the oven. Using the parchment paper as a sling, gently lower the dough into the hot pot. Cover with the lid and bake for 30 minutes.
- Uncover & Crisp: Remove the lid and continue to bake for another 15-20 minutes, or until the crust is deeply golden brown and sounds hollow when tapped.
- Cool & Enjoy: Transfer the bread to a wire rack to cool completely before slicing. This allows the internal structure to set and prevents a gummy interior. Enjoy it warm with a pat of butter, alongside soup, or as a base for sandwiches.
This beginner-friendly dutch oven bread recipe truly proves that homemade bread doesn't have to be complicated!
Elevate Your Loaf: Herb-Infused Olive Oil Dutch Oven Bread
Ready to add a gourmet touch to your baking? This herb-infused olive oil bread is a delightful addition to any meal, boasting a golden, slightly crispy crust and a soft, airy interior. The sprinkle of fresh herbs on top adds a beautiful visual appeal and an intoxicating aroma that will fill your kitchen.
Ingredients for Herb-Infused Olive Oil Bread:
- 3 cups all-purpose flour
- 1 teaspoon active dry yeast
- 1 teaspoon salt
- 1 ½ cups warm water
- 2 tablespoons extra virgin olive oil (good quality makes a difference!)
- 2 tablespoons fresh herbs, finely chopped (rosemary, thyme, oregano, or a mix work wonderfully)
- Optional: a pinch of flaky sea salt for sprinkling on top
The Aromatic Process:
- Combine Dry Ingredients: In a large bowl, mix the flour, yeast, and salt.
- Add Wet & Enrich: Slowly add the warm water and olive oil to the dry ingredients. Mix until a shaggy dough forms. Unlike the no-knead, this recipe benefits from a little kneading to develop gluten and achieve a smoother texture.
- Gentle Kneading: Turn the dough out onto a lightly floured surface and knead for 5-7 minutes until it's smooth and elastic. If you have a stand mixer, use the dough hook for about 3-4 minutes.
- First Rise: Place the dough in a lightly oiled bowl, turn to coat, then cover with plastic wrap or a damp cloth. Let it rise in a warm place for 1-1.5 hours, or until doubled in size.
- Shape & Infuse: Gently punch down the dough and shape it into a round loaf. Place it on a piece of parchment paper. Sprinkle generously with the chopped fresh herbs, gently pressing them into the surface.
- Second Rise & Preheat: Loosely cover the dough and let it rest for another 30 minutes while you preheat your oven to 425°F (218°C) with your empty Dutch oven inside.
- Bake & Savor: Carefully transfer the dough into the preheated Dutch oven using the parchment paper. Cover and bake for 25 minutes. Remove the lid and bake for an additional 15-20 minutes, or until golden brown and fragrant. If desired, sprinkle with flaky sea salt after removing the lid for an extra pop of flavor and texture.
- Cool & Serve: Let the bread cool on a wire rack before slicing. This aromatic loaf pairs perfectly with soups, salads, pasta dishes, or simply with a little more olive oil for dipping.
Beyond the Basics: Exploring Other Delicious Dutch Oven Bread Recipes
Once you've mastered the foundational dutch oven bread recipes, a world of possibilities opens up. Here are a few more popular variations to expand your baking repertoire:
1. Sweet Cinnamon Raisin Dutch Oven Bread
Perfect for breakfast or a sweet snack, this bread offers a burst of warmth and sweetness. The base ingredients are similar to the no-knead method (flour, yeast, water, salt), but with the addition of sugar, cinnamon, and plump raisins. Mix the dry ingredients including sugar and cinnamon, add water, let it rise, then gently fold in a generous amount of raisins before the final shaping and baking. It's fantastic toasted with butter or enjoyed on its own with a cup of coffee.
2. Wholesome Whole Wheat Dutch Oven Bread
For a more nutritious and rustic loaf, whole wheat Dutch oven bread is an excellent choice. Using whole wheat flour provides a denser crumb and a nuttier flavor. The process involves whole wheat flour, water, yeast, and salt. Mix the ingredients, allow for a good long rise (whole wheat can take a little longer due to the bran interfering with gluten development), shape, and bake. This wholesome option is wonderful for sandwiches, alongside hearty stews, or simply with jam.
3. Artisan Sourdough Dutch Oven Bread
If you're ready for a more advanced but incredibly rewarding challenge, sourdough Dutch oven bread is a must-try. This method uses a sourdough starter instead of commercial yeast, leading to a bread with a complex, tangy flavor and an incredible texture. The process involves mixing flour, water, salt, and your active sourdough starter, followed by a series of folds and long fermentation periods, often overnight. Baking in a Dutch oven ensures that iconic sourdough crust and an open, airy crumb. It’s a rewarding recipe that brings a sense of accomplishment and warmth to any meal, perfect for sandwiches or toast.
Dutch Oven Bread Baking Tips for Success
To ensure your Dutch oven bread recipes turn out perfectly every time, keep these essential tips in mind:
- Preheat Your Dutch Oven Properly: This is arguably the most critical step. A super-hot Dutch oven creates instant steam and a strong initial burst of heat that helps the dough spring up beautifully and develops a fantastic crust. Always preheat the pot for at least 30 minutes with the oven.
- Don't Over-Flour Your Work Surface: When shaping, use minimal flour to avoid drying out the dough, especially for no-knead recipes where the stickiness is normal.
- Patience is Key for Rising: Resist the urge to rush the rising times. The long fermentation not only develops flavor but also creates the ideal texture. Room temperature can affect rise times, so adjust accordingly.
- Score Your Loaf: Before baking (especially if it's not a no-knead loaf), a quick score with a razor blade or sharp knife allows the bread to expand predictably in the oven, creating a beautiful ear and preventing uncontrolled cracks.
- Handle Hot Equipment Safely: Always use oven mitts when handling a preheated Dutch oven. It will be extremely hot.
- Cool Completely: As tempting as it is to slice into a warm loaf, letting it cool on a wire rack allows the internal starches to set, preventing a gummy texture and ensuring a better crumb structure.
- Experiment with Flours: While all-purpose is versatile, don't hesitate to try bread flour for a chewier loaf, or a mix of whole wheat and all-purpose for added fiber and flavor.
Conclusion
The journey into mastering easy Dutch oven bread recipes is a rewarding one. From the effortless elegance of the no-knead method to the aromatic allure of herb-infused creations, and the comforting goodness of whole wheat or cinnamon raisin, there's a Dutch oven bread for every baker and every occasion. With just a few simple ingredients and the magic of your Dutch oven, you can consistently produce loaves that are not only delicious but also a source of immense satisfaction. So, grab your Dutch oven, choose your favorite recipe, and embark on your own homemade bread adventure today!
